


Interference Branch Reduction Around Sheds and Playsets
Key Takeaways About Interference Branch Reduction
Interference branch reduction means removing or reshaping tree limbs to stop them from contacting sheds playsets and other structures. This guidance is for homeowners and property managers who need safe clearances and long term regrowth control around backyard structures.
- Identify rubbing points by checking paint grooves and loose fasteners.
- Prevent damage by measuring swing arcs under likely wind conditions.
- Avoid improper cuts by placing final cuts at the branch collar.
- Spot vigorous sprouts early and prune to laterals facing away.
- Reduce wind surface area with selective thinning and small reductions.
- Plan follow up inspections seasonally and document measurements and photos.
Introduction
Branches rubbing against sheds, playsets, and fences cause slow damage that homeowners often miss until parts fail. Repeated contact strips paint, weakens wood, and can break fasteners during storms or high winds. In suburban yards near mature trees, small rubbing points can become major repair needs over time. Homeowners in Arlington notice these issues most where canopies overhang structures.
Clearance distance is the main factor that prevents rubbing and sudden breakage around backyard structures. A consistent gap keeps branches from swinging into roofs or platforms during wind gusts. Poor cut placement accelerates decay and encourages weak regrowth that can return the problem. Properties in Weatherford and similar areas face the same risk when pruning is done improperly.
Cut placement and pruning technique affect how a tree heals and where new shoots form after removal. A cut too close to the trunk or too far from a branch collar can leave stubs or open wounds that invite decay. Regrowth control matters because vigorous sprouts often aim directly at nearby structures. Left unchecked, those sprouts recreate rubbing points within a single season.
Diagnosing whether interference will become structural damage starts with visible signs and simple checks around the structure. Look for frayed paint, wood grooves, cracked fasteners, and recent limb scars on tree branches. A professional inspection will measure clearances, assess cut quality, and note sprout patterns before recommending work. If you notice ongoing rubbing or visible damage call a trained arborist for a safety-focused evaluation.
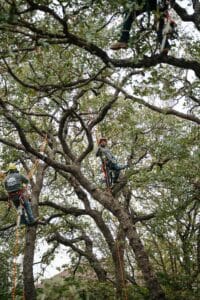
What Interference Branch Reduction Means For Homeowners
Interference branch reduction means removing or reshaping branches to prevent them from contacting structures and causing damage. Homeowners ask whether this work stops paint wear and broken fasteners, and the answer is yes when clearance is properly established and maintained. This work focuses on directing regrowth away from sheds and playsets while preserving tree health. It also lowers the chance of sudden limb failure during storms by reducing levered weight on problematic limbs.
- Creates a consistent clearance gap around structures.
- Limits new sprout growth toward buildings.
- Reduces rubbing and abrasion on wood and metal.
- Improves access for inspections and future pruning.
A proper interference branch reduction protects roofs, siding, and play platforms from repetitive contact and abrasion. Homeowners commonly want to know how much gap is safe, the right distance depends on branch size and expected wind movement. Inspectors look for scuff marks, worn paint, and loose fasteners as clear signs that branches touch structures. Professionals then measure swings and sag under load to set practical working clearances.
The process balances safety and tree health by choosing cuts at the branch collar and avoiding large flush cuts that cause decay. A simple homeowner check includes watching branches during wind to see actual movement relative to structures. For a technical evaluation, an arborist will use measurements, photos, and a written report to confirm which cuts and reductions are needed. In Arlington yards and properties in Weatherford, these steps prevent recurring damage while maintaining canopy integrity.
Why Branch Rubbing Happens And How To Assess Damage
Branch rubbing often starts where branch bark shows fresh abrasion or cutting scars from past work. Inspectors look for bark missing in strips, healed wounds with callus tissue, and fraying on nearby siding. A visible groove on wood or chipped paint near the roofline is a strong clue that movement has occurred. These signs indicate active contact and higher risk of fastener fatigue and wood failure over time.
To confirm damage, a professional will watch branch movement in a wind event or gently simulate sway to see contact paths. Measurements at multiple heights record the nearest approach of limbs to structures and reveal where clearance is insufficient. Technicians may note branch diameter, length, and attachment angle because those factors change how a limb swings. A documented inspection often includes photos and simple measurements for comparison during follow-up visits.
Symptoms on the tree itself help determine how aggressive cuts should be and where to place them for good healing. Look for included bark, weak unions, or multiple sprouts at a single junction, these indicate a higher chance of future rubbing. A pruning plan that targets those problem points reduces future regrowth toward a shed or playset while preserving stronger scaffold branches. For more planned shaping, homeowners can review overhang control options and specific gap techniques online.
Assessing damage also means checking structure hardware and surfaces where branches hit most frequently. Screws, brackets, and paint failures near contact areas point to repeated loading and should be scheduled for repair. If an inspection reveals decay inside a cut wound or large cracks at a union, a climber or arborist should evaluate removal or reduction options. Homeowners in Arlington and property owners near Weatherford should consider a formal inspection when they see these combined tree and structure cues.
Common Causes Of Structure Contact And Wear
Contact and wear most often start where branches pivot on narrow stems, concentrating force on small contact points against structures. Wind-driven sway creates repeated micro-impacts that abrade paint and loosen fasteners over months. Heavy wet foliage increases lateral load and worsens contact during storms. Observing where bark fibers peel away shows the exact rubbing line on both tree and structure.
Branches with included bark or narrow crotch angles transfer shock differently, so they often cause faster surface wear on sheds and play platforms. Inspectors look for torn bark, compressed wood fibers, and small fractures in fastener holes when diagnosing active contact. A pro will check branch diameter, attachment angle, and distance at multiple heights to map likely impact zones. These measurements help predict which limbs will keep contacting structures when foliage thickens.
Repeated trimming that leaves long stubs or flush cuts contributes to decay and weak regrowth that targets nearby structures. Correct pruning removes the interfering portion while leaving the branch collar intact to promote solid healing. For homeowners wanting to learn proper cut placement, see guidance on practical cutting methods for lasting results. Professionals also consider how future sprouts will emerge and plan reductions to limit that regrowth toward playsets.
Routinely missed causes include nearby utility ties, vines, and secondary stems that deflect branches during wind, increasing lateral movement against structures. During inspection, technicians use simple sway checks and photos to confirm which secondary growth causes the most abrasion. Documented observations guide targeted removals and selective thinning that reduce swinging mass without destabilizing the tree. In Weatherford and Arlington yards, these focused corrections prevent recurring wear while retaining usable canopy near backyard structures.
Safe Clearance Distances For Sheds And Playsets
Set clearance by measuring how far branches move at the worst expected wind speed, not just at rest. Measure clearances horizontally and vertically to capture swing arcs near roofs and platforms. For small playsets, plan for a larger margin because children add dynamic loads during use. Homeowners who inspect should note where limbs cross the swing path for future checks.
- Allow extra space for branch sway.
- Increase gap near rooflines and gutters.
- Keep limbs off playset canopies.
- Widen clearance for larger diameter branches.
For most backyard structures, a practical working clearance ranges from one to several feet depending on branch size and exposure. Larger limbs need noticeably more room because their swing radius grows with length and mass. Inspectors often record nearest approach at multiple points along a limb to set a safe target distance. In Arlington properties, these measurements help prevent sudden contact during storms.
When determining exact gaps, account for future regrowth and seasonal leaf-out that increase branch surface area. Mark target cut lines and measure after pruning to confirm the actual remaining clearance. A professional will include these measurements in a written report for follow-up inspections. Homeowners in Weatherford should keep records to spot any return of rubbing over years.

Proper Cut Placement And Pruning Techniques
Start cuts outside the branch collar and follow the natural angle of the collar to encourage proper wound closure. Make a three-step cut on larger limbs to avoid bark tearing and to preserve the collar tissue. Use a handsaw or pruning saw sized for the branch diameter and keep blades sharp to make clean cuts. Professionals also note the remaining limb length to predict future swing arcs relative to a structure.
When removing limbs that threaten a shed or playset, avoid leaving long stubs because stubs attract decay and sprout growth toward the structure. Cut placement should allow the wound to callus over quickly and direct new shoots away from the target area. For branches with heavy weight, professionals often pair pruning with temporary support or rigging to control the drop. For guidance on balancing load during removals, review branch weight balancing practices before major cuts.
Selective thinning reduces wind surface area and limits the chance of branches rebounding into structures after pruning. Remove crossing or competing stems at their point of origin to prevent vigorous sprouts from inheriting the problematic angle. Prune small-diameter shoots back to a lateral branch that faces away from the structure to redirect regrowth. In Arlington yards, these choices reduce repeated contact while keeping the canopy usable for shade and privacy.
Inspect cut wounds after pruning and record their position relative to the structure for future checks and maintenance planning. If sprouts appear quickly in the first growing season, plan light follow-up pruning focused on pedestrian clearances and sprout removal. For practical follow-up work and access control, consider techniques used in pedestrian clearance pruning when trimming at ground level. Homeowners in Weatherford should schedule seasonal checks to confirm cuts healed and that new growth does not recreate rubbing lines.
Regrowth Control Strategies For Long Term Safety
Plan a multi-year schedule to limit sprouts that aim at structures, using targeted removal during dormant seasons to slow regrowth. Focus on cutting back new shoots to a lateral that points away from the shed or playset to change future growth direction. Where many sprouts appear, a professional may recommend repeated light pruning across seasons rather than a single heavy cut to avoid shock. Document each follow-up so you can compare regrowth rates year to year.
Use growth-direction trimming to train stems away from vulnerable areas and reduce future interference branch reduction work by directing energy into safe scaffold branches. Tiebacks or temporary supports can hold young branches in the desired orientation until wood stiffens and the angle stabilizes. Check ties monthly to avoid girdling and adjust as the branch thickens, removing supports when the new angle holds. Small corrective moves early prevent larger removals later and preserve canopy form.
Manage competing sprouts by removing the weakest or most inward-facing shoots to concentrate growth on a single outward-facing leader that won’t threaten structures. For heavy sprouting at a cut site, thin to one or two well-placed shoots and prune the rest to the collar to reduce future rubbing paths. Monitor these selected leaders through the first two growing seasons for taper and attachment quality. Replace any leader that shows included bark or poor union before it approaches a structure.
When regrowth persists despite correct pruning, consult a certified arborist for options such as chemical growth regulators or periodic maintenance contracts to maintain clearance. A professional will inspect wound closure, measure shoot angles, and recommend timing for follow-up cuts based on species vigor and site conditions. Homeowners in Weatherford often schedule these checks after leaf-out and before active growth accelerates. Property owners in Arlington may find written maintenance plans helpful for tracking long-term regrowth control.
When To Call A Professional For Interference Branch Reduction
If branches pose immediate danger to people or play equipment, call a pro rather than attempt large cuts yourself. A professional can inspect attachment quality, measure swing arcs, and evaluate decay using visual checks and simple tools. They will confirm whether a limb needs reduction, bracing, or full removal based on observed movement and wound condition. For medium-risk situations, a trained crew reduces hazard while preserving the tree’s structural integrity.
- They perform a step-cut on large limbs.
- They inspect branch collars for proper healing.
- They assess included bark and weak unions.
- They plan follow-up checks for regrowth.
Call when you see rapid sprouting that returns branches toward a shed or playset despite prior pruning efforts. A professional will use measurements, photos, and a written plan to document clearance needs and projected regrowth. They can recommend seasonal timing and specific cuts to redirect leaders away from structures, reducing future intervention. Homeowners in Weatherford often request these documented plans to compare outcomes year to year.
Request a pro if limbs show internal decay, cracks at the union, or large suspended weight above structures. Technicians inspect for hollowing, bark separation, and sudden deflection under light load to confirm risk before cutting. If a work plan includes growth control products, ask about options and follow-up schedules before applying them. Property owners in Arlington find scheduled maintenance reduces emergency work and protects play areas long term.
Seasonal Maintenance Plan And Inspection Checklist
Start a seasonal maintenance plan by scheduling inspections at least twice a year, after leaf-out and before dormancy. During each visit, walk the perimeter of sheds and playsets while noting any fresh contact marks on structures. Measure current clearances horizontally and vertically to track changes since the last inspection. Record measurements and photos for comparison on future checks.
During inspections, check recent pruning wounds for proper callus formation and signs of decay near cut sites. A professional will confirm cut placement and may reference the three-cut method for safe limb removal when larger reductions are planned. Note any vigorous sprouts that point toward structures and mark them for follow-up pruning in the next maintenance window. Timing follow-up work in the dormant season reduces stress on the tree.
Create a simple checklist that includes swing-path observation during windy periods and a visual inspection of fasteners and paint where contact likely occurs. Include measurements for branch diameter, nearest approach, and attachment angle to predict future movement and risk. If you find cracking at unions or hollow-sounding limbs, schedule a professional evaluation before doing more work. Professionals use simple tools like measuring tapes and a camera to document inspection outputs.
Plan small, timed interventions rather than large one-time cuts to keep regrowth manageable and lower the chance of decay from big wounds. For homeowners in Weatherford, maintaining this plan helps prevent recurring rubbing across seasons and reduces emergency repairs. In Arlington, record-keeping and consistent checks reduce surprises during storms and visible wear on backyard structures. If any inspection raises safety concerns, contact a qualified arborist for a focused evaluation and written recommendations.
Frequently Asked Questions
How much clearance prevents rubbing on sheds and playsets?
Aim for at least 3 feet of horizontal clearance between branches and shed or playset surfaces to prevent rubbing and damage. For taller, flexible limbs increase clearance to 4–6 feet where movement during wind could cause contact. Monitor regrowth seasonally and trim before branches reach that buffer to maintain protection. If branches are large, near power lines, or you feel unsafe, call a professional arborist for interference branch reduction.
When is interference branch reduction necessary near structures?
Interference branch reduction is necessary when limbs contact or rub against sheds, playsets, or overhang roofing regularly. Visible bark damage, cracked wood, or fraying rope on play equipment indicates active interference and increased failure risk. If branches hang within two to three feet of structures or show decay, act promptly to reduce regrowth and risk. Work near structures can be hazardous, so use a certified arborist or professional for safe cuts and rigging.
Where should cuts be placed to avoid decay and regrowth?
Place cuts at the branch collar, just outside the swollen area where trunk meets branch, to promote proper wound closure and limit decay. For larger limbs use a three-cut method to prevent bark tearing, but hire a professional for risky high or heavy cuts. Angle final cuts to shed water away from the trunk and avoid leaving stubs that encourage regrowth and decay. If cuts are near playsets or sheds, exercise caution and consider a certified arborist to reduce safety risks and ensure correct interference branch reduction.
How do professionals diagnose rubbing and swing arcs?
A professional starts by observing the shed or playset during typical use to note exact rubbing points and swing arcs. They measure clearances with a tape and range pole, recording distances from moving parts to nearby branches. Technicians use a clinometer or laser rangefinder to map branch height and swing envelope, then photograph and mark problematic limbs. If branches pose a fall or impact risk, they will caution homeowners and recommend professional pruning or removal for safe interference branch reduction.
What follow-up schedule limits regrowth after pruning?
Schedule light follow-up pruning every 6 to 12 months for young, fast-growing trees near sheds and playsets to limit regrowth. Inspect branches seasonally after storms and during active spring growth for new rubbing or crossing limbs. For mature trees, plan corrective pruning every 12 to 36 months based on vigor and observed regrowth. If branches are large, close to structures, or pose a safety risk, hire a professional arborist to assess and prune.